As promised, here is my report on me and seventeen other excited sewing enthusiasts attending Shingo Sato's very first course ever held in Austria. I was lucky to even find out about this course since it had not been very heavily publicised and was primarily geared towards fashion students, graduates and teachers. I was a little nervous at the thought of being surrounded by so many professionals in the business but quickly realized that I was well able to keep up and even complete the assignments at a more than average pace. This garnered a lot of compliments, which feels good to the autodidactic sewing soul.
Shingo Sato was a brilliant teacher. We finished about three to four samples every day, each aimed at teaching us a new skill and concept. Shingo Sato introduced each new project with a whole range of exciting samples and then a demonstration of each technique.
 |
| Shingo Sato in Action /Photo: Akademie Sitam |
We then went off on our own to our work stations to complete the pattern making and sewing process.
His method is similar to a magic trick. When you don't understand how it is done you are bewildered but once you are shown the technique behind each design you almost feel a little cheated. It is so simple! And I don't mean this in a derogatory sense at all. His designs are very unique and creative but they nevertheless rely on the immovable basic principles of pattern cutting. In the same way a magician still has to contend with the basic principles of physics.
Basic is, of course, a little bit of an understatement. You have to have a fundamental understanding of pattern cutting, including dart manipulation and added fullness, to grasp the techniques. You also need to be able to work quickly and precisely and sew corners and even the deepest of curves with precision. But once you have that sorted nothing keeps you from trying out some of Shingo Sato's techniques. He has a
youtube channel, so you can get started right away.
We started off with a simple enough project: Drawing a creative style line on a bodice sloper which eliminates the need for the the traditional back and front darts.
Shingo Sato starts all his projects with a basic sloper sewn in muslin instead of drawing directly onto a flat pattern. His argument is that it is easier to visualize the final outcome and I couldn't agree more - especially when projects and style lines become more intricate. It is certainly not impossible to start out with a flat pattern but I believe it requires more abstract 3D visualisation and may require more samples before a satisfactory design can be achieved.
We then elaborated on this technique in a skirt design and also added some extra fullness to the skirt sloper before drawing our own style lines.
 |
| My "Donut" Skirt |
Our last project of Day 1 was a design that incorporated both designing new style lines and, what Shingo Sato calls, draping on the flat.
 |
| My Flat Draping Exercise |
Day 2 was filled with several flat draping projects including two heart designs. One was simply draped, the other one included a sash integration.
 |
| My Draped Heart |
 |
| Draping in Progress |
 |
| My Sash Heart |
 |
| Co-students' great Sash Hearts/ Photo: Akademie Sitam |
I have done a similar, although less dramatic, sash integration in a
blouse before with the help of Pattern Magic 1.
 |
| My Sash Blouse |
We also experimented with an Origami pocket.....
 |
| Me folding the Origami pocket |
 |
| My Origami pocket |
.....before moving on to the perhaps weirdest design of the workshop: the Balloon technique. It looks very odd and again somewhat physically impossible but is actually not that hard to achieve.
 |
| Preparing the pattern for the balloon technique |
 |
| Finished Draped Balloon |
My favourite exercise was on Day 3 when we integrated a sleeve into our design. All the samples he showed us were very inspiring and I have already come up with a host of design ideas in which his method of sleeve integration could really help to make the design process easier.
 |
| One of Shingo Sato's great designs |
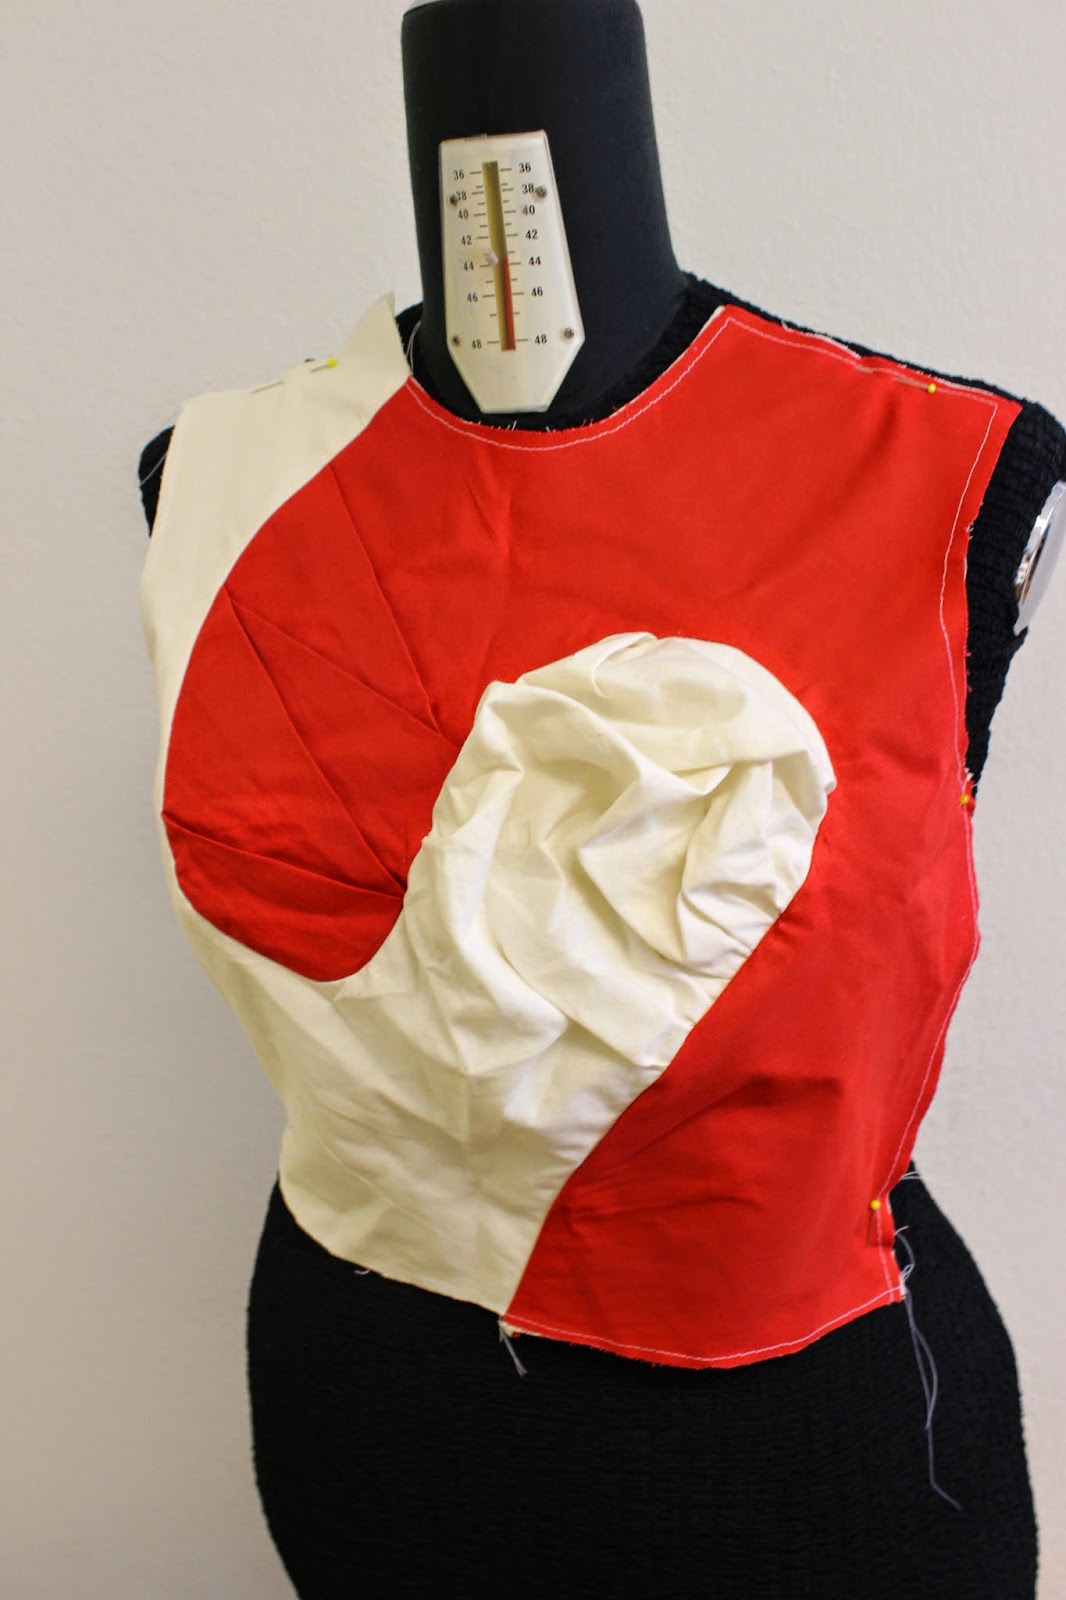
In the class I settled for a style that I called the Icelandic jumper, because the ring design really reminded me of traditional Icelandic knitwear. So I stuck to the colors of the Icelandic flag.
 |
| The 10-piece Icelandic jumper pattern |
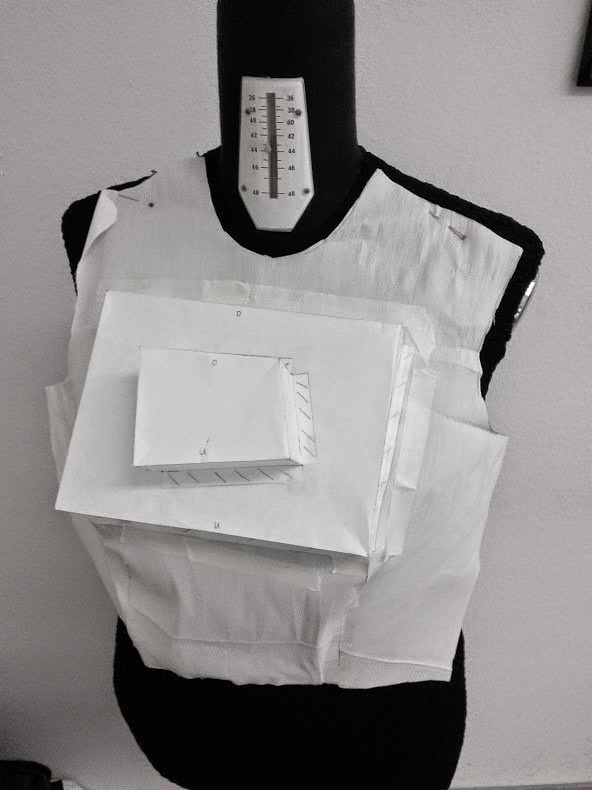
Our last project was the much awaited box integration. Again, what a fantastic magic trick! So simple and yet so elusive. Unfortunately, the design didn't turn out so well for many of us since we didn't bring fabric stiff enough to give the boxes their necessary structure and rigidity.
 |
| The finished box with top box inverted |
 |
| Preparing the box pattern |
Well, and that was it. If you'd like to see more photos of some of the other participants' projects, you can find many on Shingo Sato's
Facebook page. And if you are interested in trying his designs out for yourself, there are two books available through the
Center for Pattern Design. He also has above mentioned
Facebook page with lots of inspiring pictures and a
youtube channel, where you can watch a lot of his techniques for free.