

Hi everyone, amidst the turmoil of The Great Big Emigration Sale, the BurdaStyle Shirred Dress Sew-Along continues unabated. BI'm back today with the second instalment, in which we'll be doing an FBA (Full-Bust Adjustment) for those of you who need one, and we'll prepare and cut out all of our pattern pieces.
At this stage you should have all you pattern pieces traced. If not, go back to the previous instalment to see how.
Now, if you have chosen your size according to your bust measurement, jump on ahead to PREPARING YOUR PATTERN PIECES. If you have used your high bust measurement to find your size, cut out your front piece only and follow along with me for a full bust adjustment.
FULL BUST ADJUSTMENT (FBA)
First, hold your piece up to your body as if you were wearing it (shoulder of pattern to your shoulder, center front of the pattern to your center front) and mark your bust point. This does not have to be overly accurate but gives us a general idea.

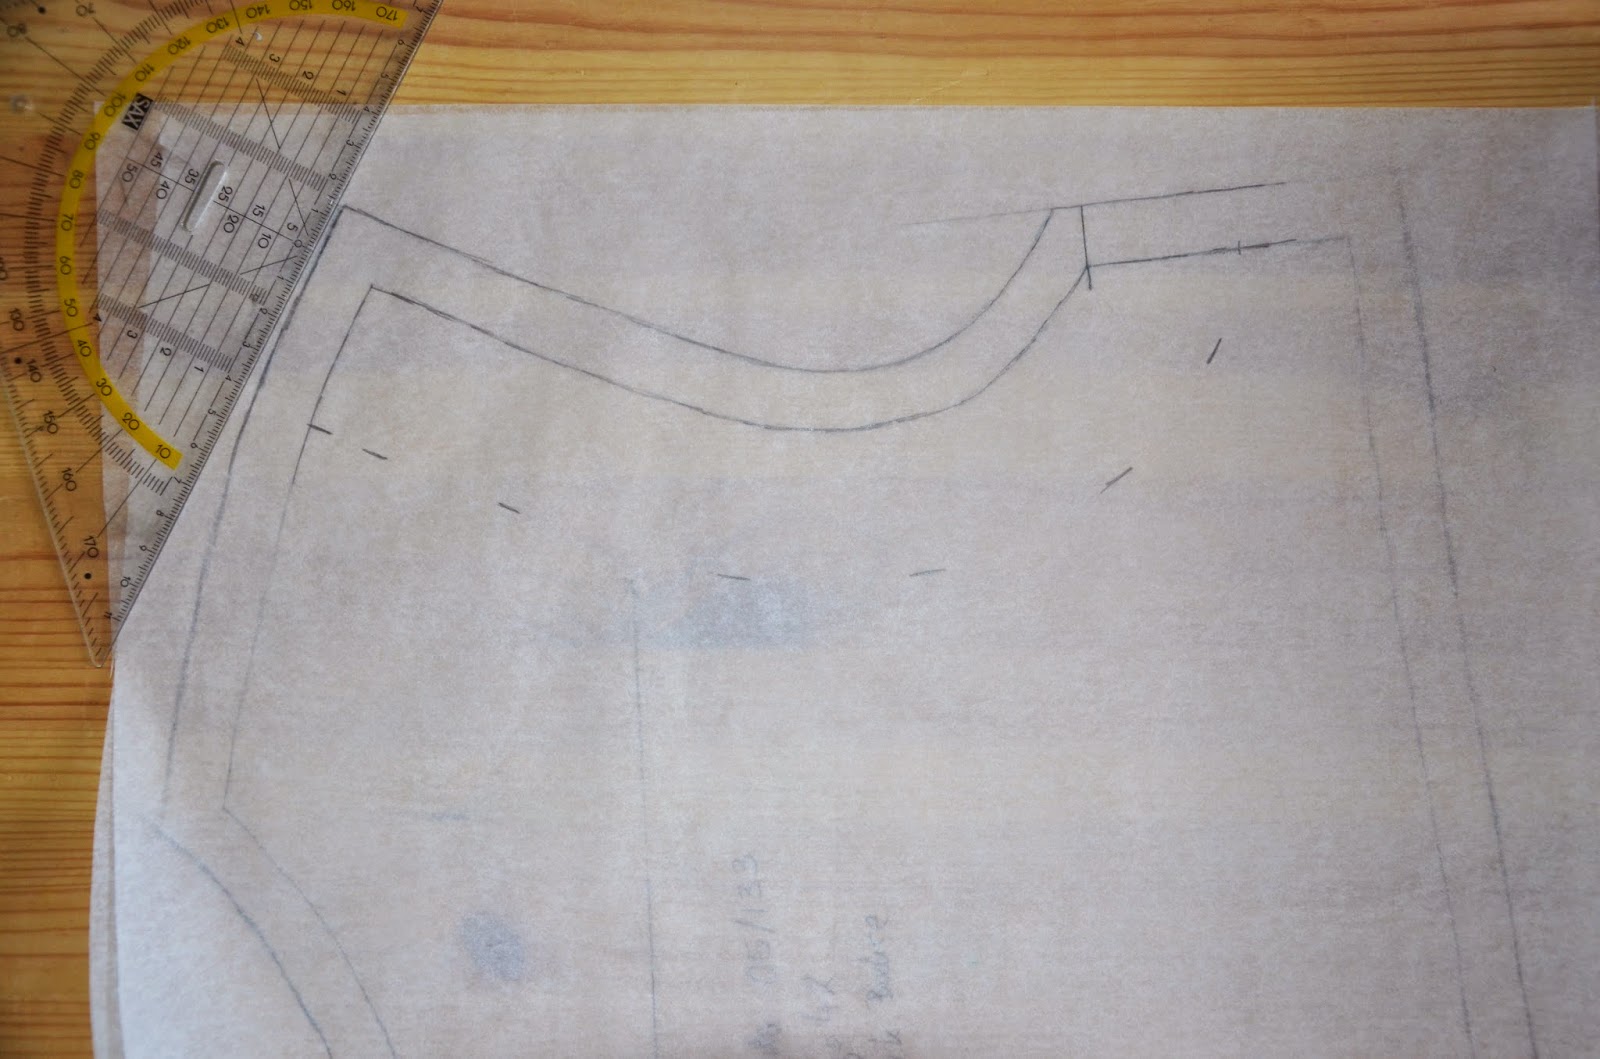
With your bust point at the center draw the following three lines onto your tissue.

Now slash your pattern along these lines.


Then go ahead and glue everything together as you can see from the picture below and cut off overhanging paper (not yet done in photo below).

And that's called a Full Bust Adjustment, or FBA. Congratulations!
PREPARING YOUR PATTERN PIECES
Next we will need to add seam allowance to all of our pieces. Remember that BurdaStyle magazine patterns NEVER have seam allowances included. We need to add them. In the instrcutions you are usually given a guide as to how much seam allowance is suggested. See under SEAM AND HEM ALLOWANCES:

You do not have to stick to this. I chose to add 1.5 cm all around. Don't forget that pieces that are cut on the fold don't need seam allowances added, as in the back piece pictured below.

Now your four traced pieces are ready to be cut.

But I'm making you make two more pattern pieces, that we will use as armhole facings. Take your back piece and draw in a line 4 cm away from the armhole and trace it onto another piece.

Do the same with the front armhole. Don't forget to add in your grainlines. That's it.
But hey, what about the skirt and the pockets you say?! For those we have to turn back to our BurdaStyle instructions. Find where it says 2 skirt panels and 2 pockets under CUTTING OUT:
Your skirt panels will be 83,85, 87, 89 or 91 cm wide, depending on your size. For size 34 it's 83 cm, for size 36 it's 85 cm and so on. For all sizes the skirt will be 74 cm wide. Each pocket is 25 cm by 19 cm regardless of size.
Forget about the bias strips for the armholes. We have already made our own facings earlier.
I won't make pattern pieces for either skirt or pockets but will just mark both directly onto the fabric.
So here we have it. All pattern pieces done: Back bodice, front bodice, front neckline facing, back neckline facing, front armhole facing and back armhole facing.

CUTTING OUT YOUR PATTERN PIECES
BurdaStyle suggests that you cut all your pieces on the crosswise grain. Remember grain? I chose not to do so and you don't have to either. It's up to you. The only pieces I will place on the crosswise grain for a bit of a fun effect are my pocket pieces (My fabric is stripy).
BurdaStyle instructions tell you how many of each piece to cut out. See under CUTTING OUT:
You cut piece 21 (front) 2x, piece 22 (back) on a fold 1x, and so on. Once everything is laid out on the fabric and the skirt and pocket pieces marked you are ready to cut.
I cut mine in a strange and complicated way, not suitable for photographing. But here you can see how I laid out my facing pieces on my left-over material:

Notice how my front facing is overhanging the fabric edge?! That's because I decided last minute to cut my front bodice plus facing on the fold. This means I didn't need the seam allowance I had included in the pattern piece. Hence it is now overhanging and effectively eliminated. Make sense?
Next you will cut both armhole and neckline facings out of a suitable iron-on interfacing. I usually choose a lightweight woven interfacing, but somehow I was inspired to try a lightweight knit interfacing for this project.

If you are in doubt of what interfacing to use you can stick to the recommendation in the instructions in BurdaStyle. They tell you to use G785.by Vilene.
Fuse the interfacing onto the back of your facing pieces and then the sewing can commence.
See you again in a couple of days for the next instalment. Happy sewing!